Demo videos & screenshots

First look at Look At My Hair Free Player 1.06

Look At My Hair FREE Player 1.06

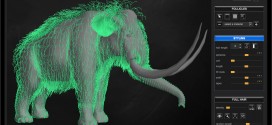
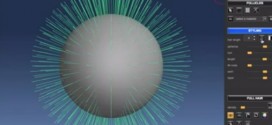
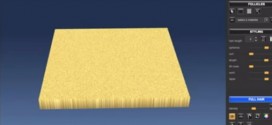
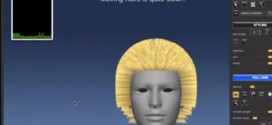
The wait is almost over for the new and improved version of Look At My Hair Free Player. Version 1.06 was submitted to the DAZ store last week, so we expect it to be available soon. The 1.06 release represents a huge step forward, introducing the multifigure feature which allows to create complex scenes with multiple furred characters. We also …

Read More »

Making of the Mammoth: part 1

This is the first part of the “Making of the Mammoth” video tutorial. As you’ll see from the movie, using deformers is such a cool way to develop and model a basic fur model very quickly. And combing, scaling and cutting hairs is just straightforward… The movie has been encoded at 3X the normal speed, so the part where I …

Read More »

Density maps: quick overview

“Quick and dirty” example showing how you can assign a density map to a surface, and how that will affect hair population. As explained in the movie, hair density will be calculated gathering grey scale values, where white pixels is full density, black pixels account for no hair, and grey values will be used to calculate interpolated densities.

Read More »

Deformers and selection controls

In this movie I’m giving a quick overview of the available deformers and how those can be combined to quickly shape hair. I’m also showing how to use selection controls to mask some areas so that deformers and styling will only apply to those. Notice how some of the deformers can be applied to one or more axis simultaneously (see …

Read More »

New feature: the Scene Explorer

I worked very hard during last two weeks and so now it’s time to start showing some of the new features. The first one is the Scene Explorer, which allows to easily add a figure or a prop available in the Studio scene directly to the Look at my Hair framework. With figures, it’s even possible to choose specific nodes …

Read More »

Symmetric editing

Since somebody asked if it is possible to edit hair symmetrically, here comes a video that demonstrates it.

Read More »

Spherize and Taper effects

I don’t recall ever demonstrating these two effects: they are very important to quickly shape guide hairs. The spherize effect nicely round all the hairs down, a bit like gravity. The taper effect will evenly taper hairs down along the vertical axes. Well,  I’m sure the video will clearly show those effects better than my words…

Read More »

Quick setup for follicle areas

Besides using the follicle brush to add or remove follicles, or the marquee tool on larger areas, another cool feature is the possibility to add or remove the follicles belonging to a specific surface. So for example you’ll be able to discard hidden or unwanted parts like eyes, nails, mouth and else.

Read More »

Windows porting: OK

One of my biggest concerns was the amount of time needed to port Look at my Hair to Windows (I work on Mac). While Qt libraries should (and do) guarantee portability, I was worried about the openGL code and multi-thread support routines. Instead, I was able to complete the port in one afternoon only: good news, this will speed times …

Read More »

Multi-threading support enabled!

I finally added support for multi-threading, which allows to use all the processor cores available and allow concurrent operations, with a huge benefit in terms of speed. Incredible how moving a large amount of hairs is now so fast! I will apply multi-threading to all those routines that require lot of calculations, and this will be a HUGE asset to …

Read More »
© Alessandro Mastronardi